Creating a Scroll-Stopper Video
What is a scroll-stopper video?
Showcase images/videos (e.g. your product) behind our thumb-stopping animations (without the social post design layouts).
Is there a use-case example?
Here are some examples created inside of the Breakout Clips editor 😍

Aside from building beautiful videos, you can also use this type of template as a 'content booster' for all your social media content.
Before scheduling/posting your content to social media, upload it into our “Scroll-Stopper” template, add an animation over it to help stop the scroll and download! You can now post it to social media and enjoy the boosted performance. 🔥
How about a case study?
Yep, that too! View a case study here.
How do I create one?
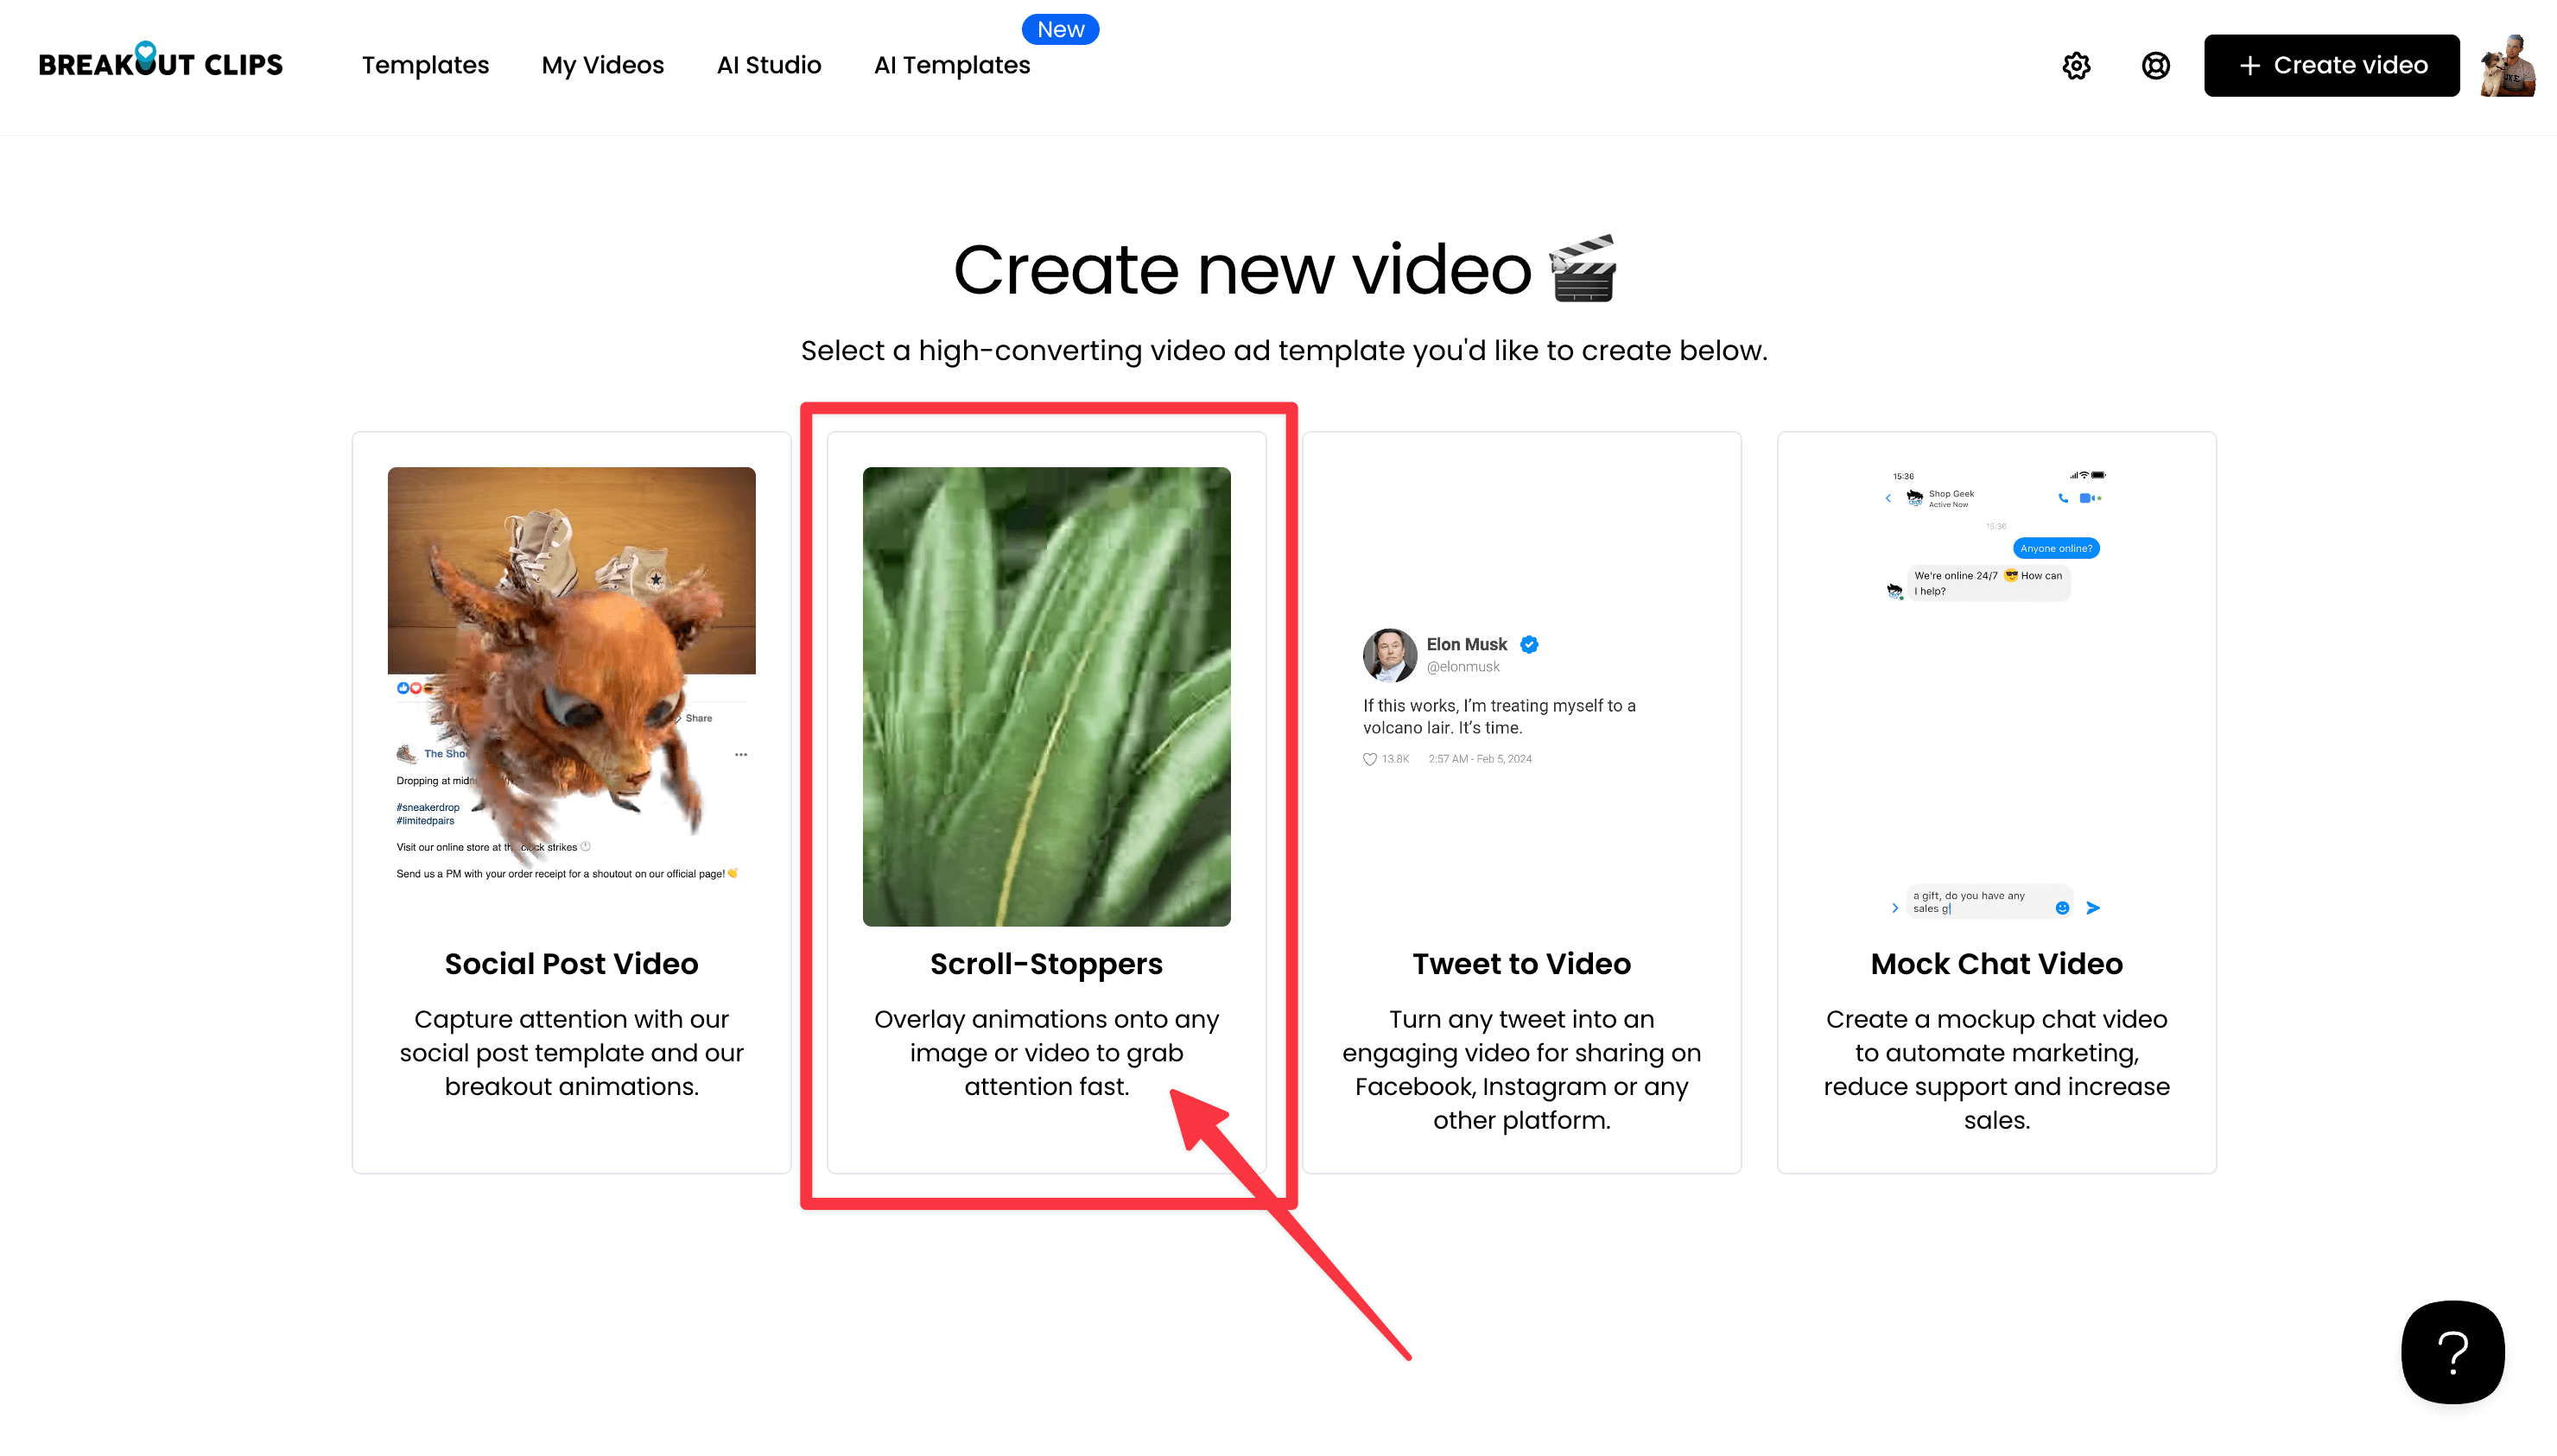
To get started, click the + Create video button in the top right of your account. Select Create without AI.
Then, click Scroll-Stoppers.
A preview of how animations will interact with your video is provided to give you an idea of how your video will look (shown below). Select the type of layout you'd like for your new video by clicking on it.

The dividing lines in each preview above represent splits in the video where you can add either one, two or even three media items to your scroll-stopper template ("media" refers to either images or videos).
Please note: Currently we have around 2,000+ animations available inside the software (segmented between the different layouts you see above). They're segmented because each animation is designed to fit the layout type. So if you select the No Grid or Side by Side layouts, you'll see one library of animations. If you instead select the Triple Stack layout, you'll see a different library of animations.
After clicking on your layout, you'll be taken to our template editor page.
Template Editor
Once you're inside the editor, you'll instantly notice the big grey media (image/video) field(s).
If you hover your mouse over it, "Click here to add media" will appear as shown below.
Here's an example if you selected the "No Grid" layout and then hovered over the image field:

And here's an example if you selected the "Side by Side" layout. The only difference is the number of media items (images/videos) you can add and how they are positioned.

For the purpose of this tutorial, we'll continue with the "No Grid" layout (the process for adding multiple images/videos is exactly the same as adding one).
You can change the size of your video (aspect ratio) by clicking this icon next to your video:

A drop-down menu will appear, where you can select either "Vertical", "Square" or "Story" as your video's aspect ratio. If you are creating a Reel, you should select "Story".
If you hover your mouse over the big grey media field, you'll notice it asks you to click inside of it to select the image (or video) you'd like to add to your video.
Click where it says 'Click here to add media'.
The (1080x1350) refers to the recommended dimensions of the media you'll be adding, but don't worry if your image is not an exact match. We have a cropping tool which allows you to adjust how your image fits the dimensions of your video. Or, you can view this guide on creating content that fits.
Adding Media
Clicking the Click here to add media field will open a pop-up as shown below:

#1 - Upload (Default)
Use this tab if you want to upload an image or video.
#2 - Search Images
Select this tab if you'd like to browse our built-in stock image library (thanks to our direct integration with Unsplash).
#3 - Search Videos
Select this if you'd like to browse our stock footage library (thanks to our direct integration with Pixabay). Please note that video backgrounds are only available on our paid plans.
For the purpose of this tutorial, let's assume we don't have our own product image to upload, so we can search the millions of free images at our disposal!

Step 1 - Click Search Images in the pop-up.
Step 2 - Enter a search keyword
Step 3 - Click Search
You can scroll down through the results, and click on any image to select it.
A cropping tool will appear where you can adjust which parts of your image you'd like to be cropped to fit the dimensions of your video:

Click Done when you're happy with your cropping adjustments and it'll be inserted into your video:
You've now added your image background! 🎉
If you're not happy with the image, simply click anywhere inside the image field again to bring up the pop-up and you can search for another.
Adding Text & Your Logo
Optionally add a call-to-action (text) or even your logo using these options.

We have a dedicated guide on using these features which you can view here.
Click Next when you're ready to apply your animation.

Adding Animations
On the right you'll see a sidebar showcasing all our animations (2,000+) you can use. You can search for animations by keyword, or click the first thumbnail ("View More" as shown below) to browse our full library.

Hover your mouse over any of the animation thumbnails for 2-3 seconds and a full preview will begin playing.
The animation itself doesn't necessarily need to be an object from your industry. The main objective of the animations are to capture attention, and you can insert your product/branding behind it. If you can get people looking at your video - you've achieved your goal!
Click on any animation to select and apply it to your video preview, or click the "close" icon in the top right corner of the page to return to the previous view.

When you select an animation, it'll be added to the video preview and you'll be able to see exactly how your video will look before it's rendered (you'll notice how the animation loops continuously).

If you want to turn off the animation's sound effect, click the sound icon in-between the next and back buttons below your video (see more detailed instructions on that here).
Once you're happy, click on Next below your video.

Click the Start Rendering button, or click the breadcrumb navigation above the button to go back and make edits.

Your video will begin rendering. Depending on your video customizations and our current rendering queue, this should not take longer than 60 seconds.
Feel free to create a different video in the meantime while you wait, your video's rendering progress will be available in your video dashboard (click "My Videos" in the top navigation menu to go to your video library).
Downloading Your Video
When your video has finished rendering, you'll be shown an option to download your video file.
Click Download as shown below.

Now you can upload your new video file anywhere! 🙌
We have tutorials that showcase how to (step by step) post your Breakout Clips videos to social media:
- How can I post my video to Facebook?
- How can I post my video to Instagram?
- How can I post my video to LinkedIn?
Other places that these videos can used include:
- Your website
- eCommerce store
- YouTube/Vimeo/Wistia
- Attach it to an email
- Send it inside a Facebook Messenger message
- and more.
We specifically developed a very unique algorithm so that your video files are compressed to be small in size, without compromising on quality. This means they can play anywhere without any loading issues.
Thanks again for choosing Breakout Clips! 🙏
If you have any questions, please click the widget in the bottom right corner to contact us. We're always happy to help!